Prototyping a Solar Powered Watering System with CircuitPython
Most people around the world are getting more and more interested in living a long and healthy life nowadays. And many studies have proven that growing house plants, as long as being a trend, improves health. The truth is, we are so busy with work, and even when we get home, that we do not have enough time to properly water our plants when they need it.
Last year, I decided to grow fresh lettuces in my windows. It was a great idea, but I was very busy and I decided that this could be automated.
In this guide you will learn how to build a functional and beginner friendly system to keep your plants alive using different sensors, microcontrollers and CircuitPython.
Plantaris Solar and previous projects
This project is a variation from two previous projects Plantaris and
Plantaris Data.
The main goal of this project was to implement a beginner friendly and
sustainable watering system.
Check the previous projects here:
Before to start…
Plantaris Solar is a prototype for testing the functionality using a beginner friendly approach. This will not be the final design / implementation.
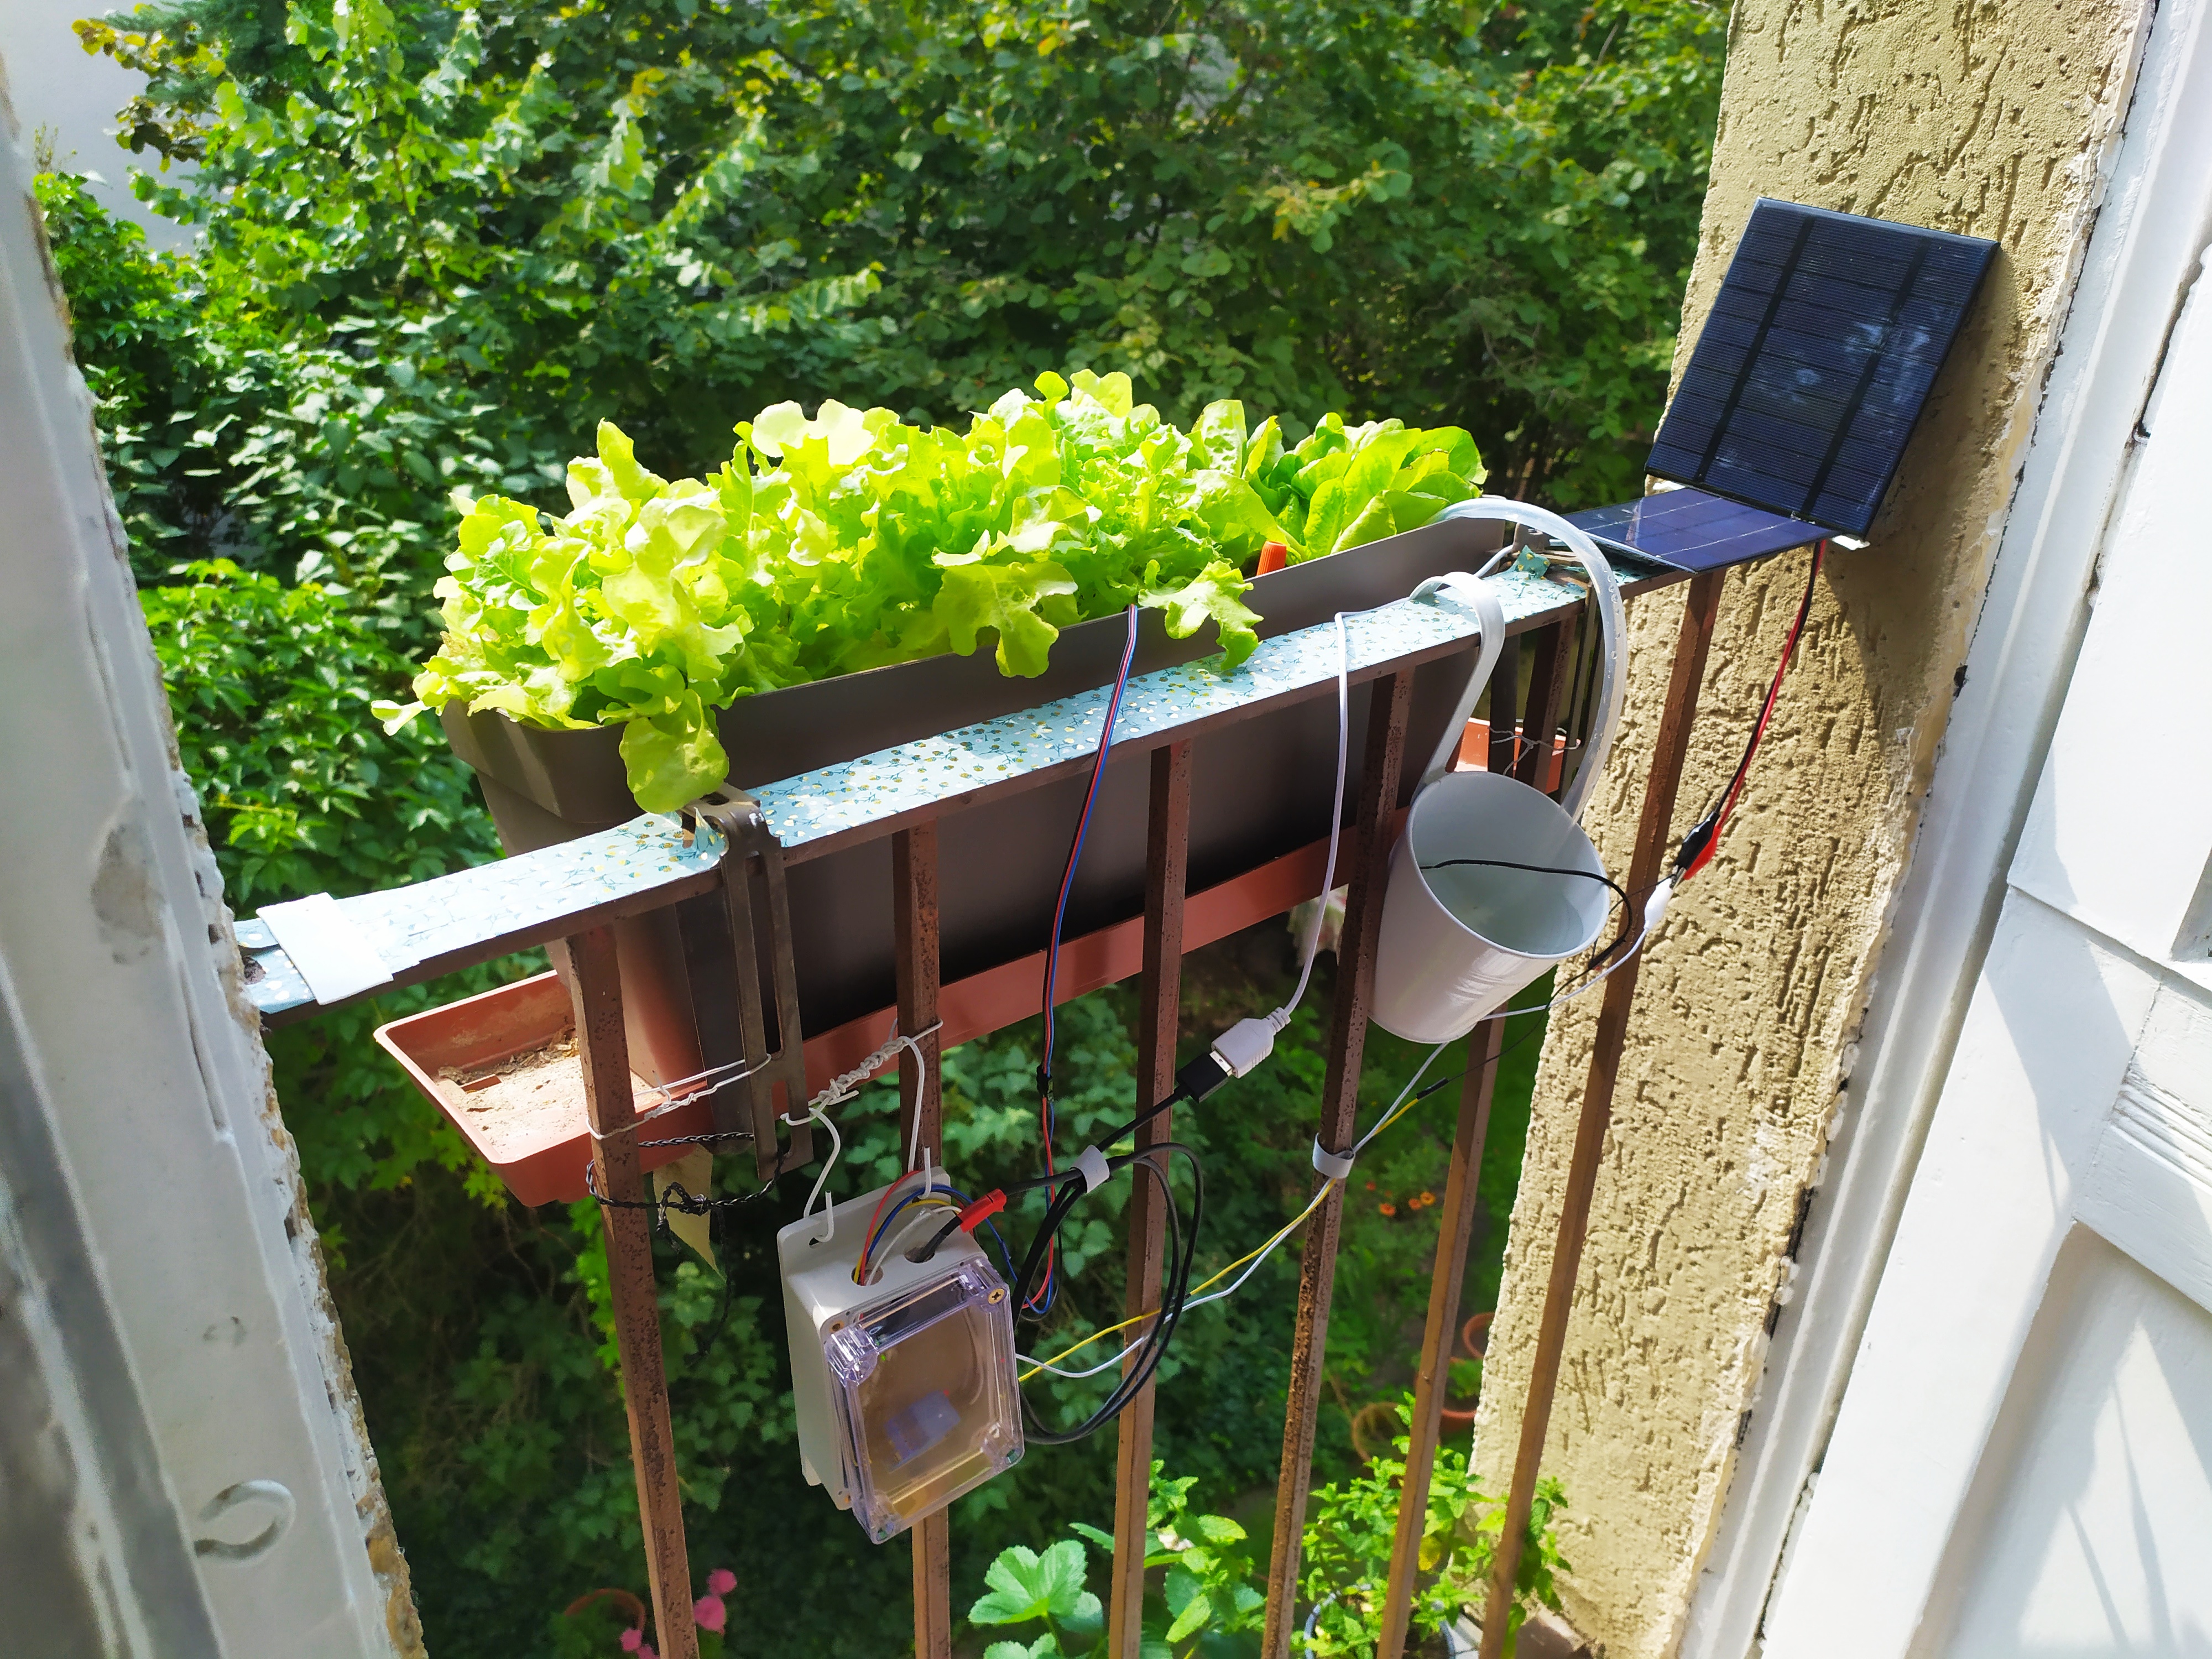
Let’s start…
Step 1: What Do We Need ?
Materials:
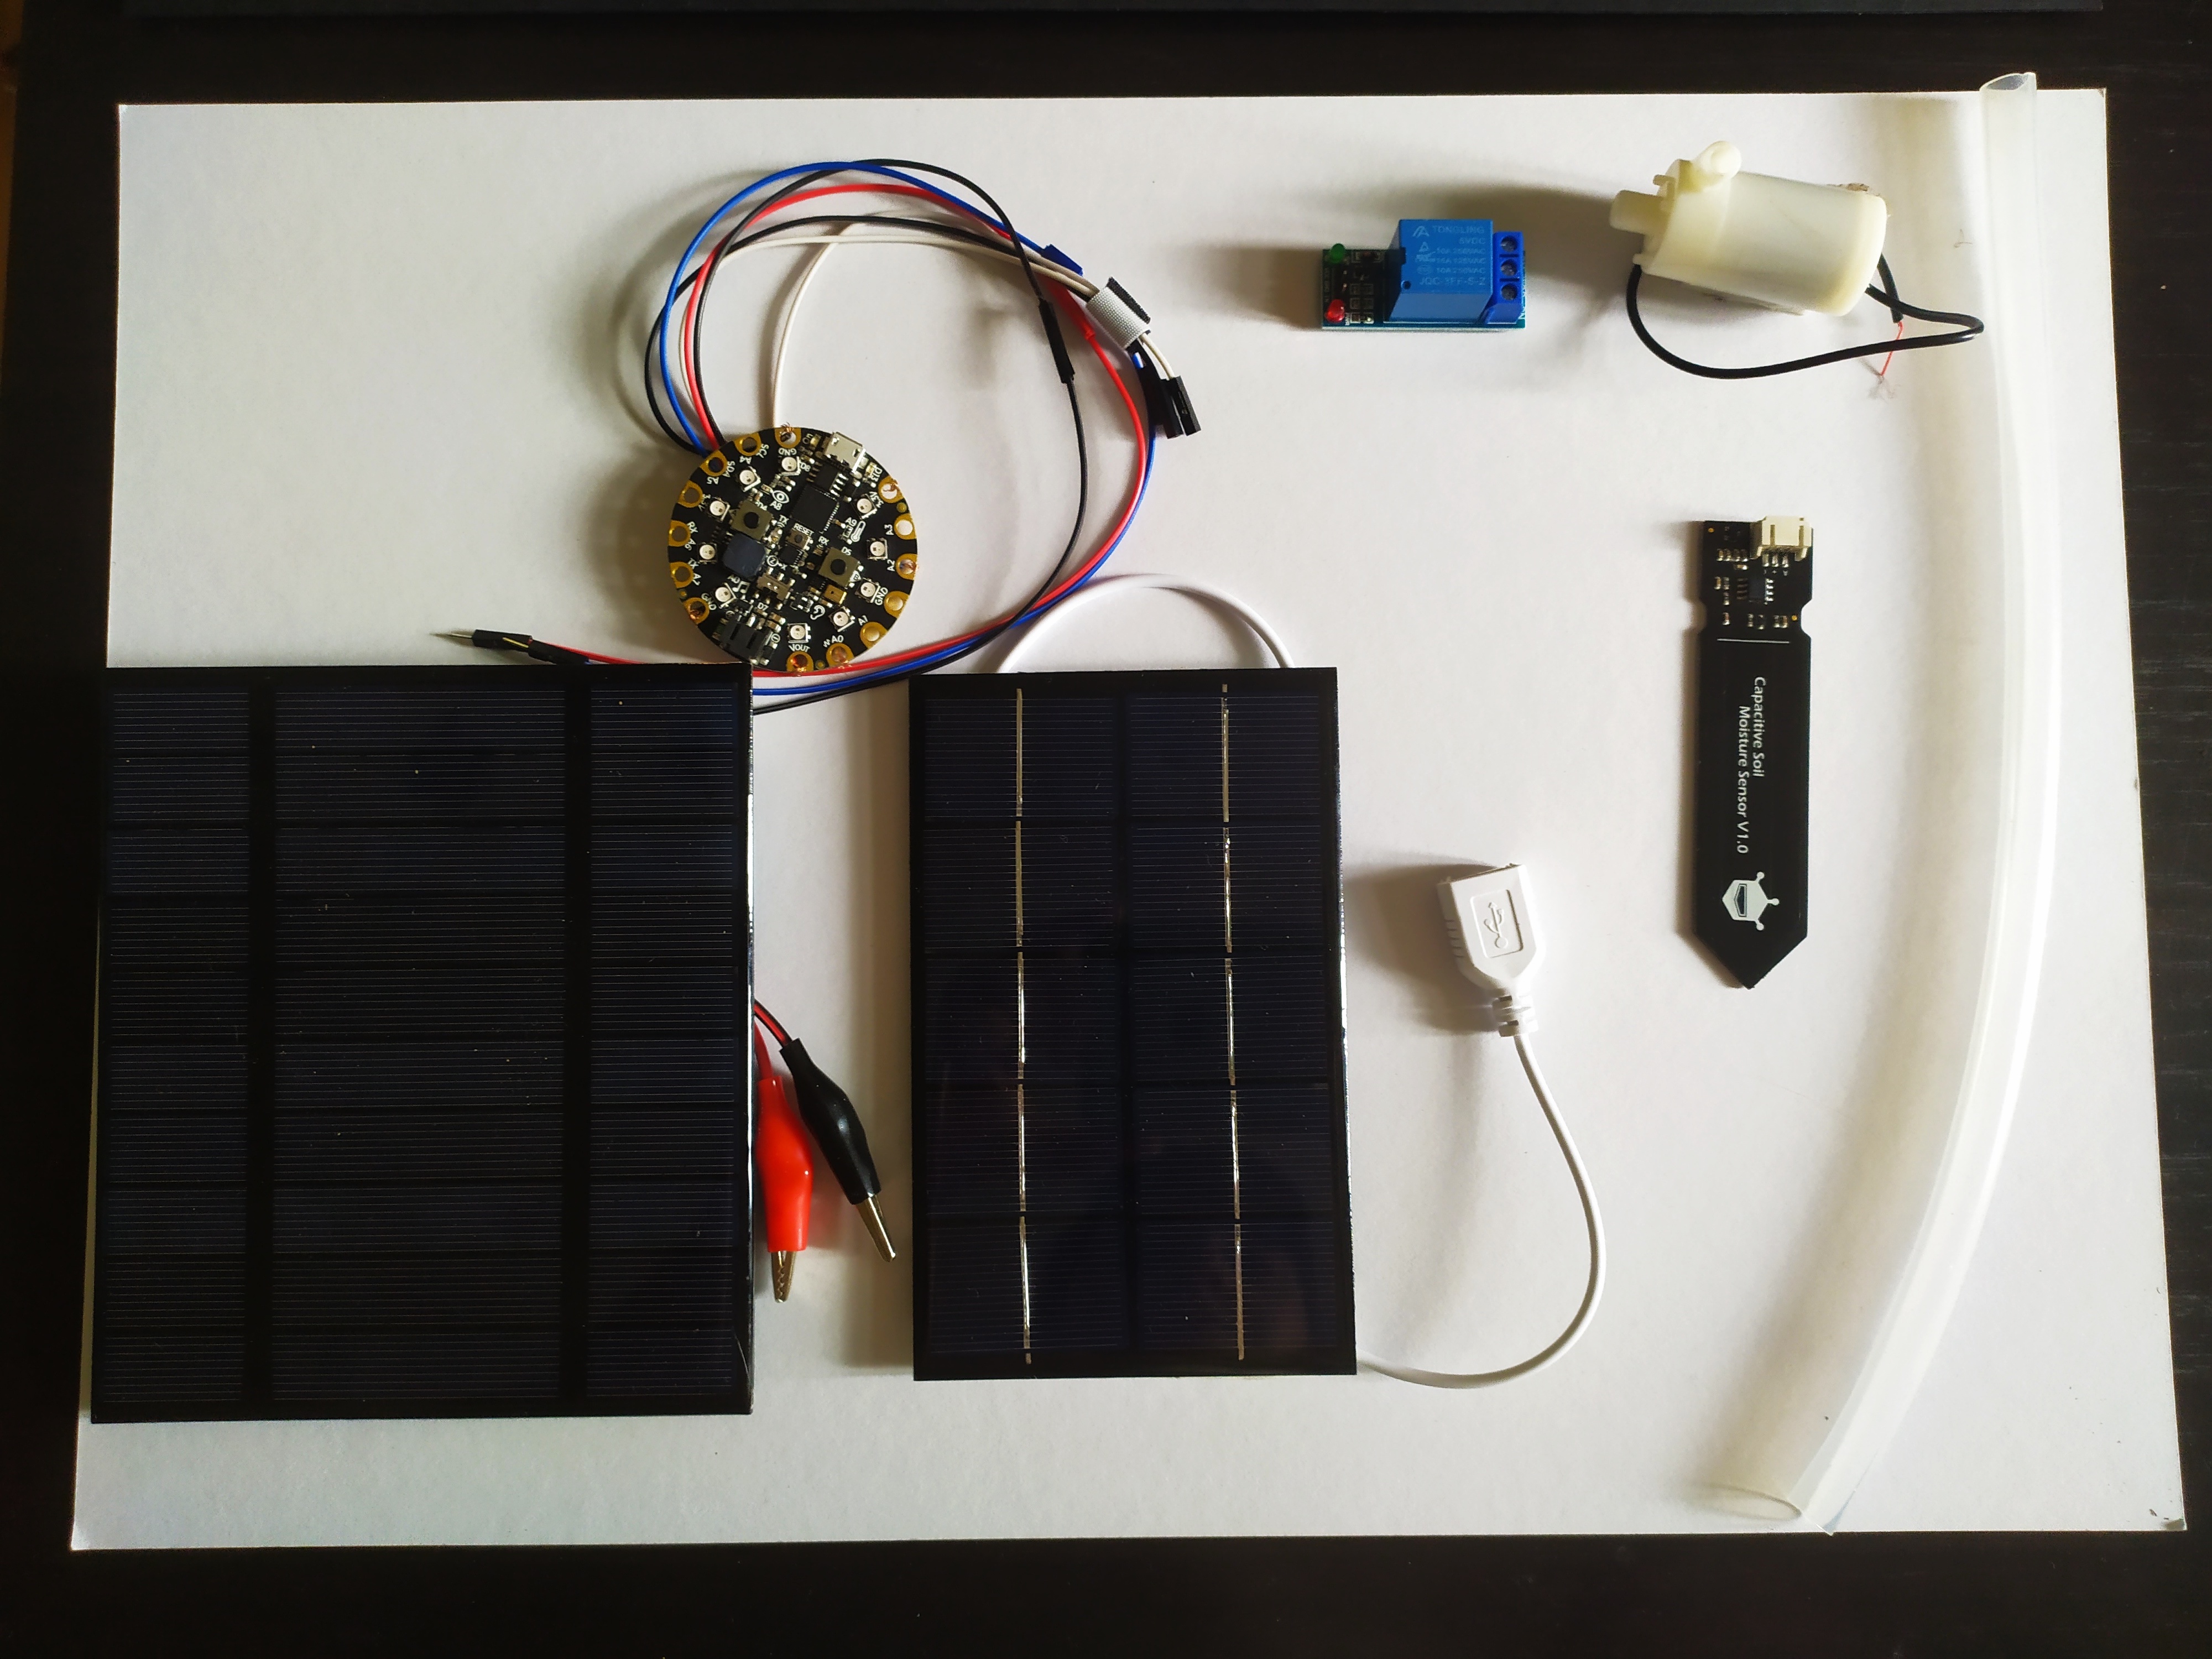
Note: This is not a product placement.
- Water pump (3.3-5V) (brand: No specified)
- Relay (brand: Songle)
- Moisture soil sensor (3.3 ~ 5.5V)(brand: robotdf)
- Cable micro B USB (brand: No specified)
- Jumper Jerky (brand: Pimoroni)
- Circuit Playground Express (brand: Adafruit)
- Panel Solar Cell Photovoltaic with Crocodile Clips 2.5 W 5 V (brand: Decdeal)
- Panel solar cell Photovoltaic with USB 2.5 W 5 V (brand: Decdeal)
- Silicone tubes
- Optional but recommended:
- Wire Alligator clip for testing
- Batteries AA for testing (or as a plan B if the solar energy is not enough) for more sustainability consider the use of rechargeable batteries.
- digital multimeter
Step 2: How should I start?
There is not an unique answer for that and you should find your own way. I am going to share some advice and how I did it, maybe this could help you as a guidance.
My recommendation is break your challenge in multiple challenges. Starting step by step and checking the different functionalities will help you to debug and find possible problems easily.
In our system we have different challenges:
- A. Energy: solar panel
- B. Watering: pump, relay
- C. Sensor: soil moisture sensor
- D. Microcontroller and programming
A. Energy:
As it was mentioned previously, we will need provide energy to the pump soil moisture sensor and the microcontroller. It is needed it to have this in mind to know how many solar panel we will need for this project. In this example we will use two solar panels to get the energy.
✨ It is important to check if you solar panel can reach the Voltage that your electrical components need. To do that, we can use a digital multimeter, we can measure voltage, resistance, and current.
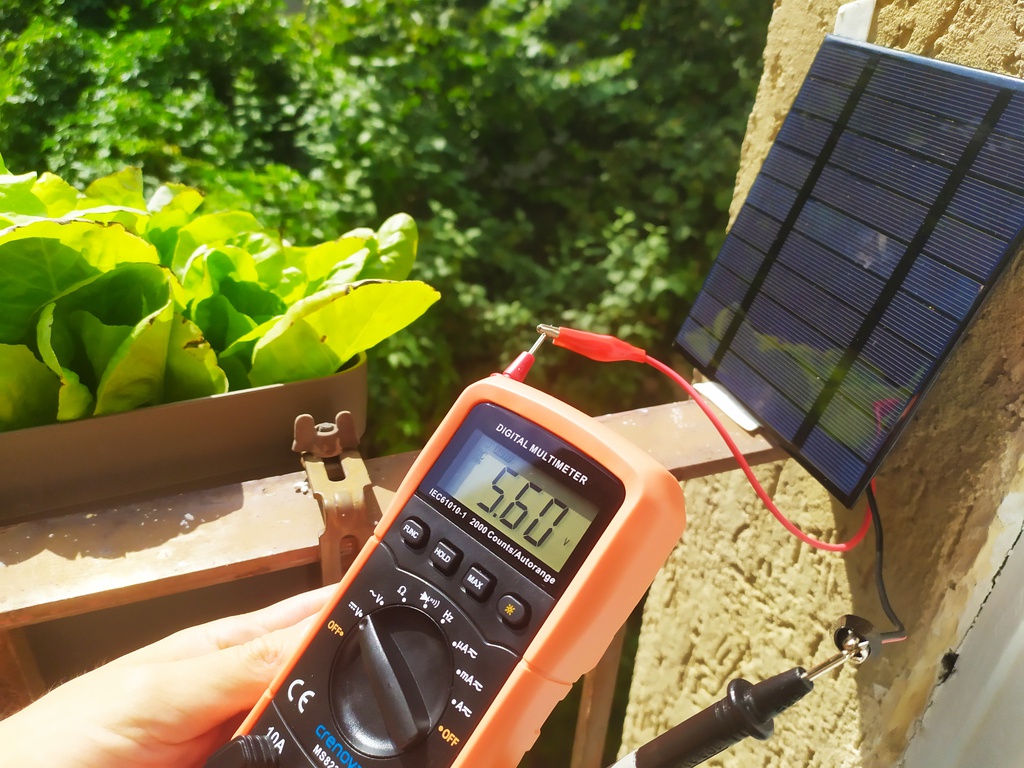 Once we checked that we can quantify the energy captured by our solar panels.
✨ It is recommended to answer some questions before buy solar panels.
🌀 Do you need storage this energy?
🌀 Can you storage the energy? How?
🌀 Do you need a Plan B for storage energy?
B. Watering: pump, relay:
For this prototype was used a horizontal water pump connected to a relay. The relay acts as a switch (ON/OFF)
✨ First it is recommended to connect your pump to some batteries (5V) and check if your pump works fine. No coding is need it!
Example:
In this video I am doing the function that will do the relay. ✨ As next step connect the relay to the pump and the batteries and try to evaluate if this works correctly.
✨ It is needed to do an experiment to know how much time you will need to water your plants.
C. Sensor: soil moisture sensor:
This section will be extended in other blog post because it is an interesting and important topic. For now, I will keep it simple.
✨ It is recommended to use “capacitative sensors” because these sensors are protected against corrosion and we will have the sensor in constant contact with soil and water, a perfect situation by corrosion.
✨ It is needed to do some experiments with our sensor and our soil. Even manufacturers have some range, could be different in our hands. Establish experiments with dry, medium dry and wet soil will provide us a range of values to determine when we will consider dry and when it will be need it to be activated the watering system. Be careful this the electronics, they are not waterproof.
D. Microcontroller and programming:
The microcontroller chose for this project was a CircuitPlayground Express (CPX). This project is trying to be beginner friendly and this microcontroller is a great option that contains a huge amount of sensors and options (see below) and no soldering is needed. It is a great option for experimentation and learning.
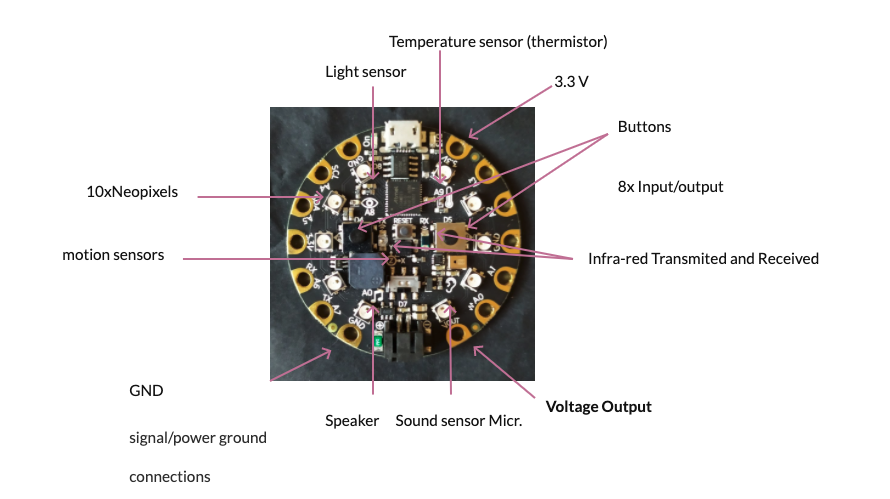
Official documentation: Adafruit Circuit Playground Express
What about the Programming language?
We will run CircuitPython in our CPX board. This version of Python is beginner friendly because it is easy to install and it is possible drag and drop on the CIRCUITPY drive.
Official documentation: CircuitPython
🌀 Could be used another microcontroller and continue being beginner friendly? yes, it depends on the previous knowledge.
Step 3: What about the coding?
✨ Be sure that you install CircuitPython following the official documentation. ✨ Be sure that you have all the libraries needed for this project.
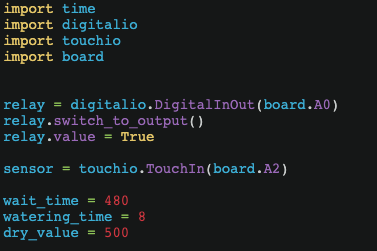
- We will connect the relay to A0 port on the CPX.
- Since the INPUT mode is by default, we change to OUTPUT, to be able to send instructions to it.
- The moisture sensor will be connected to A1 or A2 port
- The relay was configure to use the Always Close gate, so we need to set it as TRUE for the relay to be inactive.
- We will establish a period of time to check the system
- We will establish a period of time to keep watering our plants. (depends on the voltage feeding the pump, and is power).
- establish a dry value according to our previous experiments.
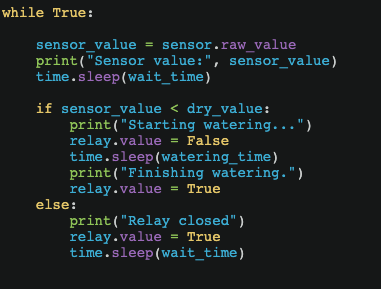
How this works?
- the sensor read the value, if the sensor value is lower than the value that we established previously. Then er connect to the relay and the system will water our plants.
- If the water level is OK, we just make the relay closed and the system will remain sleeping until the next period.
How this is written in CircuitPython?
Once you write your code your system should be functional, like this:
 Maria Jose
